
Guide to installing printers on Mac computers
- First, you need to obtain the printer's drivers necessary for Mac computers.
- Except in special cases, you can download the drivers directly from the following links on the Ricoh manufacturer's website:
- For printers in the Service area, the link is this: https://support.ricoh.com/bb/pub_e/dr_ut_e/0001343/0001343934/V11300/Ricoh_IM_C3000_C3500_C4500_LIO_1.13.0.0.dmg
- for the printer at le Stanze della Fotografia, it's this one: https://support.ricoh.com/bb/pub_e/dr_ut_e/0001337/0001337884/V4400/Ricoh_PS_Printers_Vol4_EXP_LIO_4.4.0.0.dmg
- if you encounter any problems with the previous links, you must then go to this other website for printers in the service area: http://support.ricoh.com/bb/html/dr_ut_e/re2/model/imc3000/imc3000.htm and for the printer at le Stanze della fotografia to this other one: http://support.ricoh.com/bb/html/dr_ut_e/re2/model/mpc2004ex/mpc2004ex.htm), select the language (“Select driver language”), and further down, select the version of your Mac operating system.
- Depending on your browser's settings, the file “Ricoh_IM_C3000_C3500_C4500_LIO_1.13.0.0.dmg” (or “Ricoh_PS_Printers_Vol4_EXP_LIO_4.4.0.0.dmg”), once downloaded, might open automatically or not: in the latter case, you need to double-click the DMG file to open it.
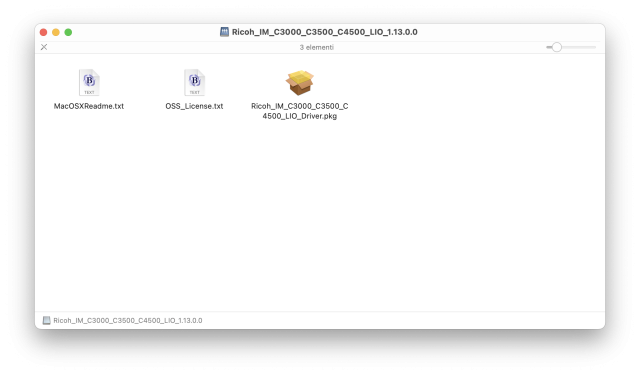
- You will then find the disk image open in the foreground, which contains the driver to be installed. Now you must open (by double-clicking) the file “Ricoh_IM_C3000_C3500_C4500_LIO_Driver.pkg” (or “Ricoh_PS_Printers_Vol4_EXP_LIO_Driver.pkg”): this will start the actual installation
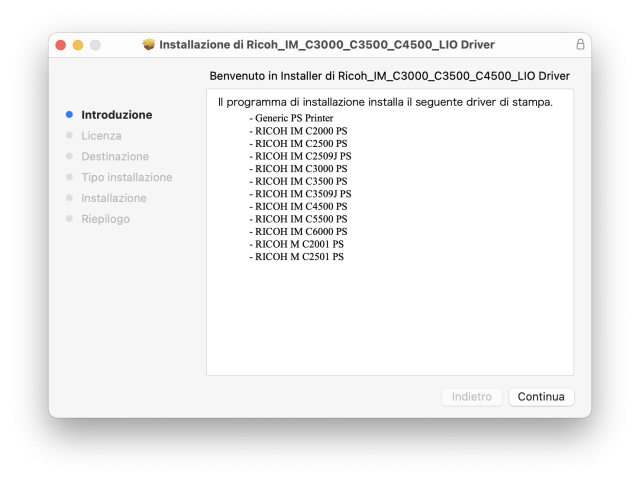
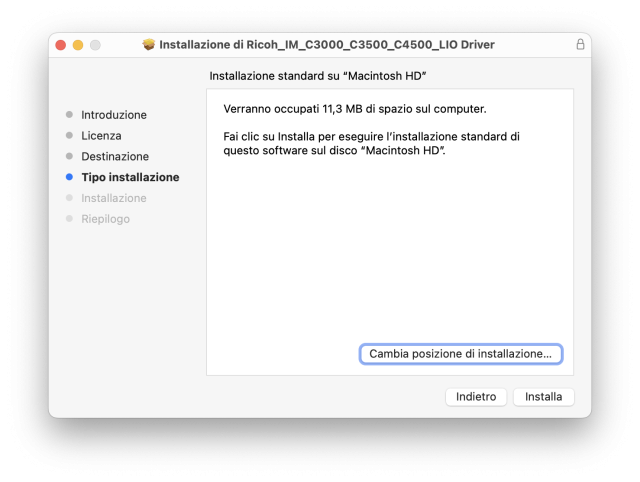
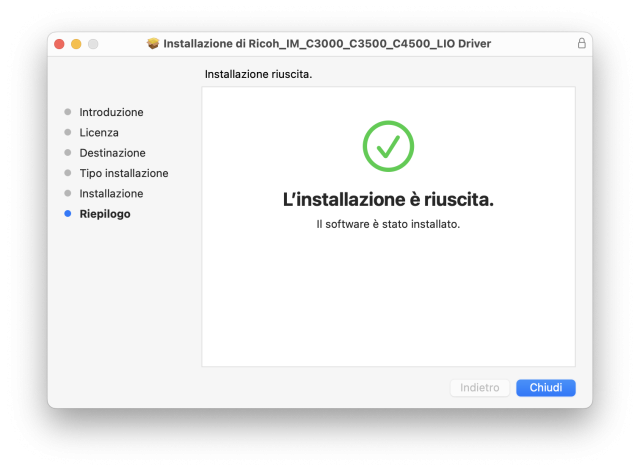
- Complete the installation procedure until the end, accepting the terms of service and entering the administrator's credentials when required. At the end of the installation, if you wish, you can move the disk image to the trash, as suggested by the installation program itself (however, before emptying the trash, you must “unmount” the disk image, as if you were ejecting a USB drive)
- Now it is necessary to add the desired printer to the system. Open the “System Settings” application (it can be found by searching from the Apple menu → “System Settings…”, or from the “Launchpad” application, or in Finder from the list of all applications in “/Applications”)
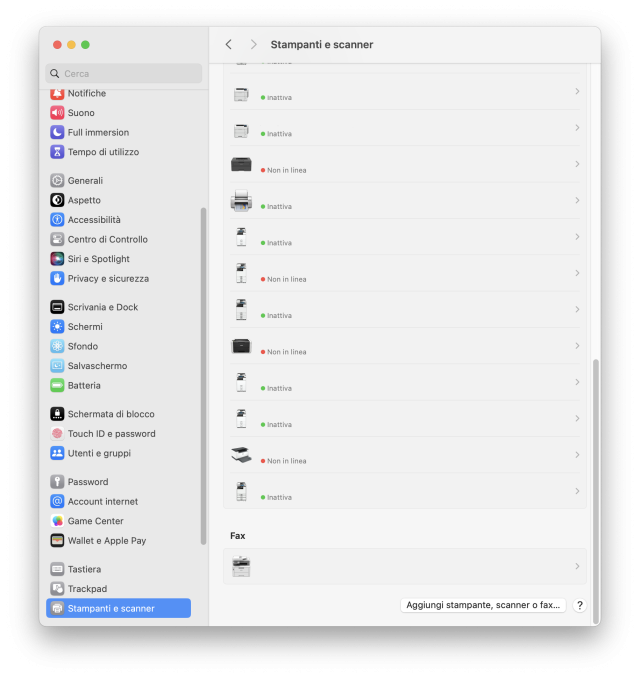
- From the list on the left, select “Printers & Scanners” (at the end or near the end of the list), then, on the right, below, click the “Add Printer, Scanner, or Fax…” button
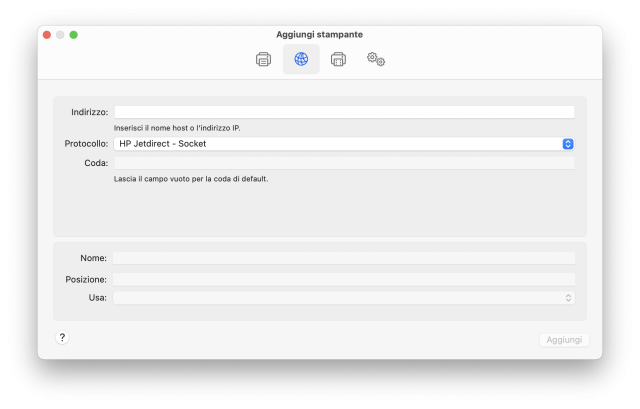
- A modal window with the required details will appear. From the top bar, select the second icon representing a world (“IP”), then fill in the various fields as follows:
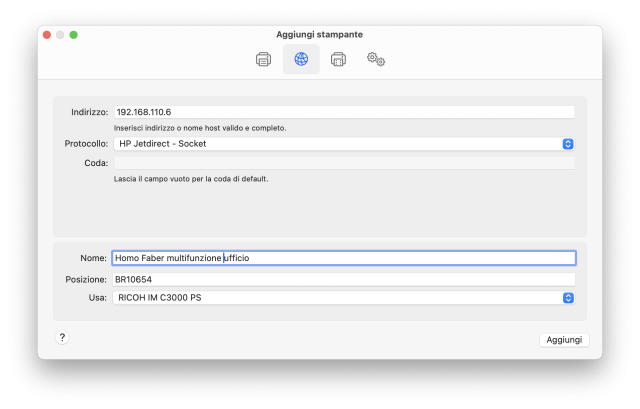
- Address: (enter the IP address of the printer, which is indicated on a dedicated label on the printer itself or the address provided by the staff. The IP addresses by now are as follows. The printer in the Service area will be 192.168.110.6, the one at Le Stanze 192.168.110.8 and the one in the Sala del Consiglio will be 192.168.120.7
- Protocol: HP Jetdirect - Socket
- Queue: (leave the field empty)
- Name: enter an identifying name for the printer (in the screenshot, “Homo Faber multifunzione ufficio” was entered)
- Location: (leave the suggested field or enter another preferred value)
- Use: the correct driver should appear automatically: “RICOH IM C3000 PS” for printers in the Service area and “RICOH MP C2004ex PS” for the printer at le Stanze della fotografia. If the field is not populated automatically, use the dropdown menu, choose “Select Software…”, and then choose the correct driver.
- Press the “Add” button
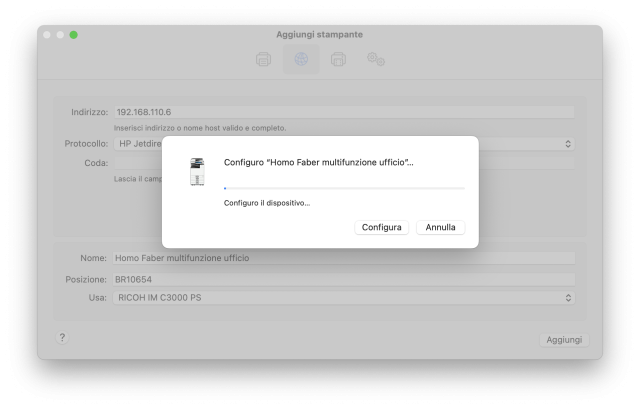
- Another pop-up window will appear. If it does not close automatically after a few seconds, then press the “Configure” button. In the window that appears next, leave the parameters as proposed by the system and confirm by pressing the “OK” button
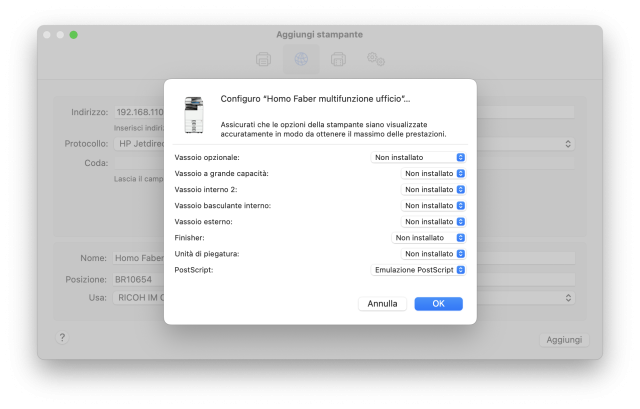
- The procedure is complete: the printer has thus been added and will be listed among the available ones in the various programs from which printing will be done.
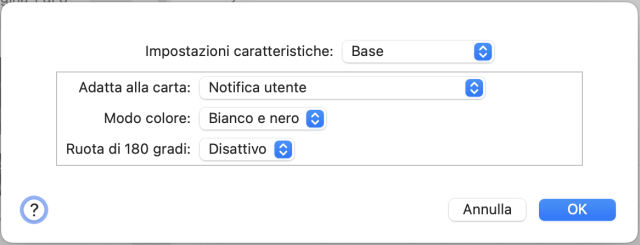
IT IS RECOMMENDED not to print in color unless necessary! In the various programs, from the print window, before sending the print job itself, remember to go to “Printer Options” (at the bottom, in the right list). 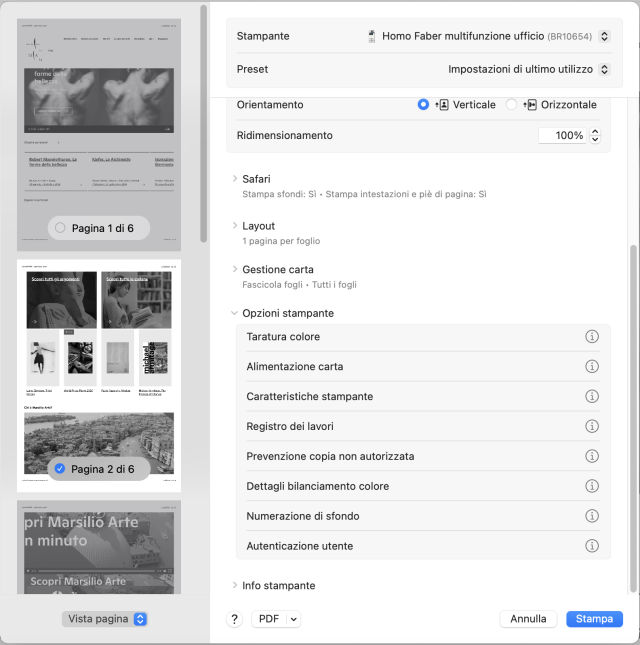 Then press the circled “i” button to the right of “Printer Features” and set “Color Mode:” to “Black and white”
  TO SET DEFAULT BLACK/WHITE PRINTING, in the print window, modify the value of the “Preset” menu in the top right, setting it to “Last Used Settings” (instead of “Default Settings”): by doing this, the system will remember the “black and white” option and all the other settings recently used. For finer control, from the same “Preset” menu, it is possible to save different groups of settings to be recalled as needed. Once the desired features are set (color, print quality, page size, etc.), choose “Save current settings as preset…” from the same menu and give a name to this settings group (for example, “Black and white only” or “Black and white and duplex”).